Profile of Pat King’s Hybrid (Hardware/Software) Setup
| By PATRICK KING |
 Complete Setup:
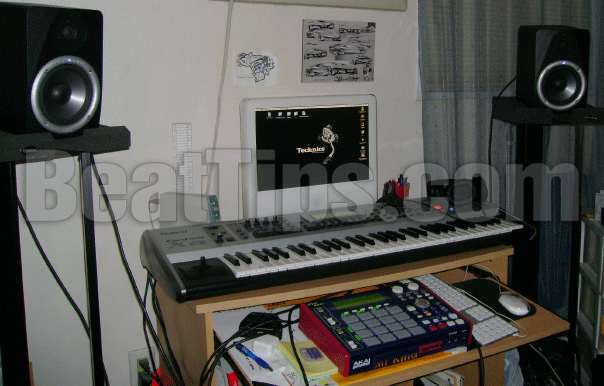
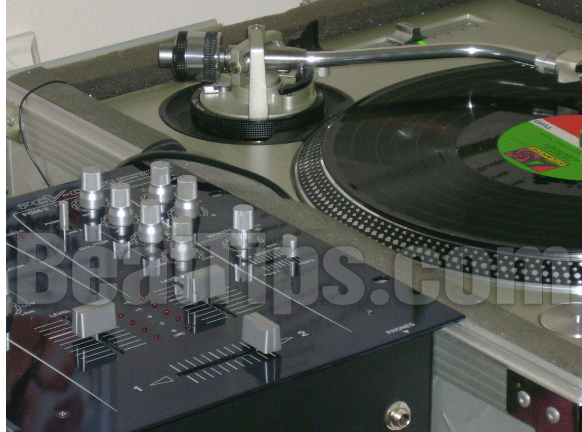
Akai MPC 1000, Roland Fantom Xa, M-Audio BX5 monitors, (2) Technics SL-1200MK2 turntables, Vestax PCV-002 mixer, Vestax Handytrax turntable (Portable), Sony MDR-7506 headphones, iMac G5 PPC (Tiger OS 10.4.11, 1.8 GHz, 2 gigs of RAM), Digidesign Mbox with Pro Tools, Waves plug-ins, Propellerhead Recycle 2.1, Record collection.
Signal flow:
MPC stereo out to TRS inputs on the M-Audio BX5 monitors. I keep Auralex MoPads on stands beneath the speakers in order to decouple them from the surface it rests. I use the Roland Fantom Xa mainly for sounds like bass, or melodic strings to layer on tracks in the MPC. Whenever I want to use the Fantom Xa, I route the Fantom’s output A mix into the MPC record in. This gives me standard audio quality (44.1KHz, 16-bit). When I’m not sampling from the Fantom, the way that I audition (listen to) sounds through is that I listen through my headphones. As for my Vestax DJ mixer, when I want to get a vinyl record sample into my computer for editing, I go from the turntable to DJ mixer. I route from the L/R record output of my Vestex DJ mixer to the Mbox source 1&2 line inputs, then I record sample on to a stereo audio track.
Though my production setup consists of several pieces of hardware and software, the main unit and sequencer that I use is the Akai MPC 1000. I transfer drum sounds and samples, (that I usually edit on the computer), to the MPC through a USB connection. I store everything on a 1GB compact flash card.
Method & Process:
When I get new vinyl records I start off by sitting down and listening to them on one of the turntables through the Vestax DJ mixer, with everything set to zero, no EQ frequencies accentuated initially. The minute I hear something that catches my attention I make a note of it on paper. I write down things like the instruments I want to use and what part of the song its located at, then continue listening for more parts to assemble a new arrangement. If the sample is complex I record it into Pro Tools and (bounce it to disk). What I mean by “complex” is that to me, it’s a sample that has a lot of nuances. In order to control those nuances I use Recycle to chop them up and manipulate those sample more precisely, then I export the results a WAV. files to the MPC.

For me, the advantages to editing on the computer rather than on the MPC is that it’s less time consuming, and that increases productivity. But I can see how it could be the reverse for someone who does edit on the MPC, especially older MPC models, like the MPC 60 II or even the 2000. Another reason that I like to edit on the computer rather than the MPC is because I like seeing the waveform of the sample on a 17-inch screen, versus the small screen on the MPC. To me, its easier to work with and break down. If its a simple sample like a one bar drum break, I just record into the MPC; maybe use the slice feature and some filters. I should point out that the MPC is not limited in editing capabilities, it’s just not as efficient as a computer is in my production process.
Sequencing, Tracking and Rough Mixing: The first track of the sequence I start off with is usually the sample, then the drums, then the bass, I just continue to build sequences and tracks until the beat is complete. When I finish all of my sequences, its time to get them into the DAW (Digital Audio Workstation). First off, I disconnect the MPC stereo out from the speakers inputs. I use the Mbox source 1&2 line inputs and connect to the MPC stereo out. I connect the line outputs on the Mbox to the speakers. I then record into Pro Tools, two tracks at a time. I can then control the dynamics of each track. Depending on what I want to achieve, I use different Waves plug-in’s. Before I finish the session I record a 2-channel stereo track of the entire beat to Pro Tools from the MPC. When I’m mixing I use headphones to get closer to an accurate mix. Stereo imaging is essential, it’s is how the audio image is placed and meshed during mixing for the listener’s ears. After I sequence my drums I leave the kick and snare centered, add some reverb to the snare for depth and pan the hi hat to the left to give off that feel that a real drummer is in that position on the stage. The contrast between mono and stereo instruments is important to understand. Panning and balancing the levels allows room for all of the instruments to breath and have their own space in the mix.
